Challenger PCI Board
General Information
Challenger PCI Board is a low cost PCI-32 board with 2 SATA Ports and 1 ATA Port.
PCI Board is built on VIA Chipset with great stability and good performance.

Using PCI Board
Challenger PCI Board will be useful il all disk with high latency time and several damaged areas.
In many cases can be used to recover lba surfaces where some reading head is damaged.
PCI Board will be controlled by Rocket with exclusive specific driver WITH NO OS INTERACTION.
Writing is Disabled in all driver configurations, so connecting a Drive to PCI Board ensures a read only procedure.
PCI Board Features
PCI Board VIA Controller has good performance and Excellent Signal Stability.
A seriously damaged device can be readed for weeks without problems.
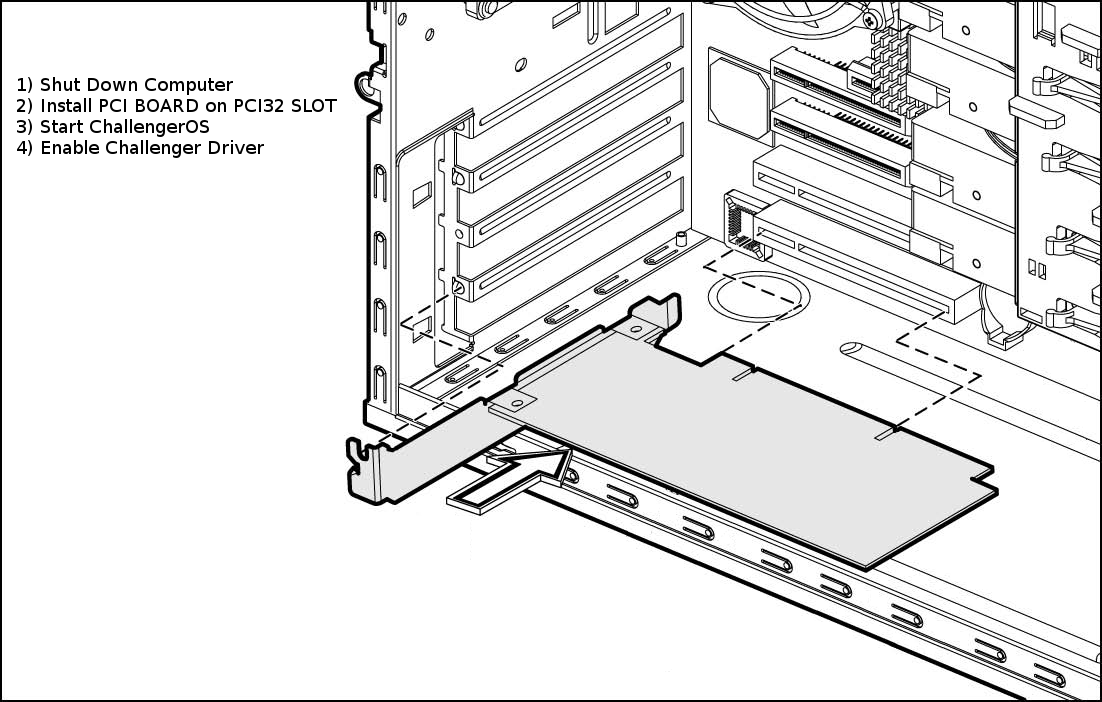
Installing PCI Board
Warning
Shut Down Computer and disconnect ATX power cable before installing the PCI Board on the Computer PCI 32 slot.
Note
from challengerOS 2.1.2 version PCI Board Kernel Module installation is automatic.
Checking PCI Board Presence
Challenger PCI Board Driver will be enabled with Rocket Startup, no user action is needed.
For checking PCI Board presence from Rocket Main Window just select :
System => PCI Board => Check PCI Board Presence
Connecting SATA Devices
- Connect One Working SATA Device to Challenger PCI Board SATA PORT (0/1)
- Connect SATA Power Cable
- Check Ready Led on Challenger Rocket Status Bar
- Push Open Device Button
- Select PCI Board connected Device ( blue disk icon )
- Press Select Button
Note
Default Challenger PCI Reading Protocol is PIO, set DMA flag from Options => Protocol to increase speed.
