Challenger Rocket Tasks
Every operation in Challenger Rocket is made using a Challenger Task.
Challenger Tasks are executed in computer memory and need one zMap file.
zMap file contains 8 bit status values for each device logical block address, tracking status of unread,good and bad blocks.
Imaging and Cloning tasks should be created on a storage position like internal or external hard drive.
Note
In case of power loss, a task can be recovered with ease creating the same task in the same position
Warning
If you are running ChallengerOS in Live Version keep in mind that all files are saved in RAM Drive, and in case of computer shutdown all data will be lost.
Hint
Refer to zMap Section for more info on maps.
Tasks in Live Sessions
If you are creating a cloning task, you will need to locate a storage position for your task data since zMap should be saved in a safe place.
For saving Task Data you can use any computer connected disk device with a working partition.
While Source Device sectors will be transferred on Target Device, zMap File will trace all readed sectors and errors.
If you are creating an imaging task, you will need a storage position for task folder, that will contain both task data and image files.
Note
Keep in mind that if you are imaging a full device, your data partition should be big enought to contain image files.
Hint
Refer to zMap Section for more info on maps.
Tasks in a Full Install Session
If yours is a full ChallengerOS installation task data can be saved on your profile document folder or elsewhere since you have a data partition.
Note
Keep in mind that if you are imaging a full device, your data partition should be big enought to contain image files.
Creating a new Task
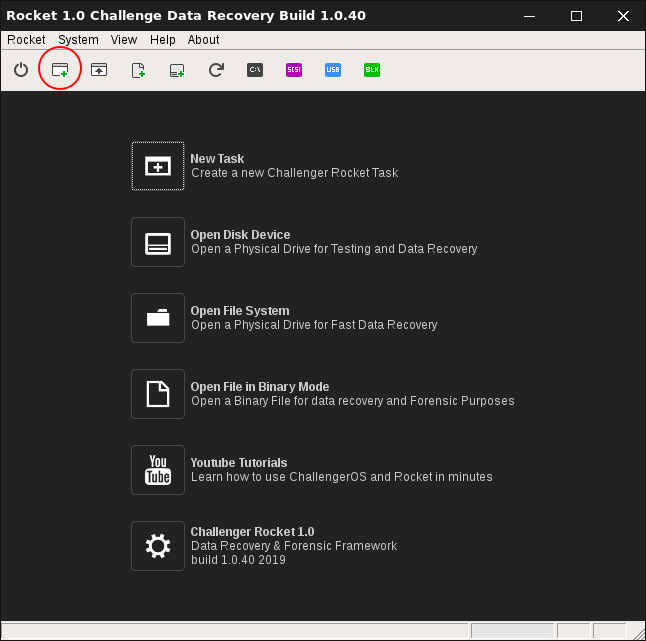
From Main Rocket Windows push New Task Button
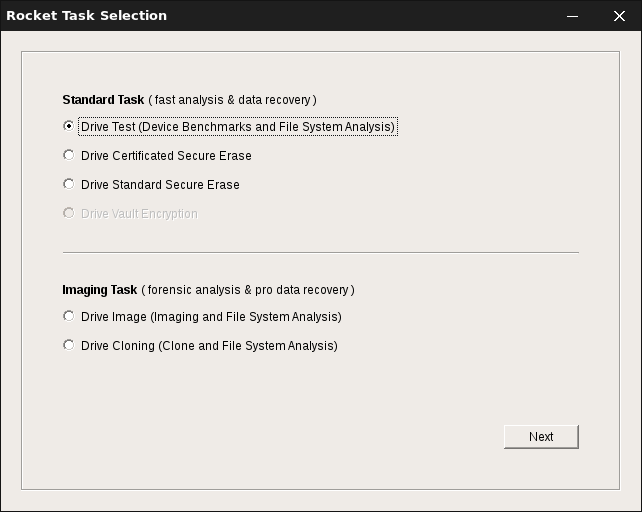
Select Task Type from list:
- Benchmark and File System
- Drive Certificated Secure Erase
- Drive Standard Secure Erase
- Drive Image
- Drive Cloning
Benchmark and File System Analysis
Benchmarks are fast analysis tasks with zMap and no target.
In a benchmark Task you will be able to perform device analysis and direct data recovery of partitions, files and folders.
Drive Secure Erase Tasks
Secure Erase Tasks will enable writing mode on source device.
Source device will be erased with custom patterns or recertified using International Secure Erase Standards.
Drive Image
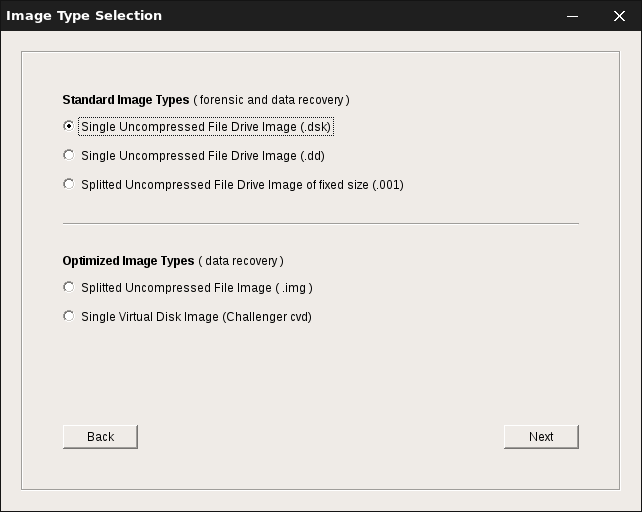
Drive Image Task will create a file image of source on task selected folder.
All Drive images should be placed into one Partition bigger than source.
Note
Read Imaging Section on this Manual for more information about Rocket Images.
See also
Choosing The Right Target Device, Imaging Of Damaged Devices
Drive Cloning
Drive Cloning Task will transfer all source sectors to selected target device.
In case of damaged blocks no buffer will be transferred to target.
In case of damaged target blocks or any write error task will be stop automatically.
Hint
If a preliminary zero fill of a block is required, check “Erase Target Block Before Writing on Task Reading Options”.
Warning
Before using any Disk drive as Target in a cloning process, perform a complete wipe of device using secure erase tools. Preliminary wipe of target is mandatory for avoiding mixing current data set with some old data located on selected target disk.
See also
Choosing The Right Target Device, Imaging Of Damaged Devices
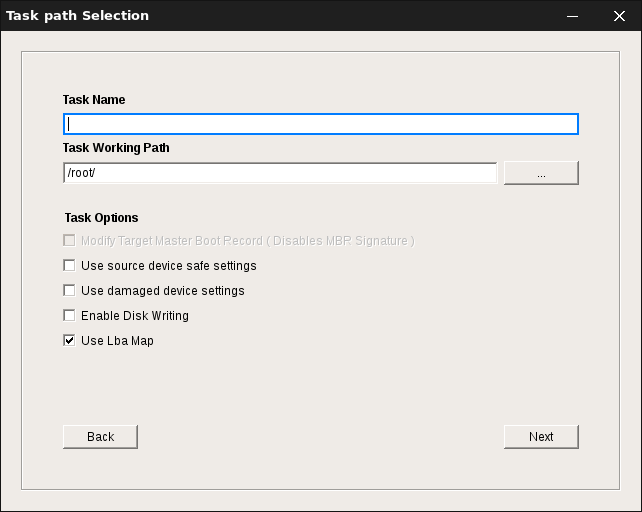
Selecting Task Folder
Tasks should be saved into a persistent storage location like an internal hard disk drive partition or an external device.
Warning
If you are planning to create an imaging Task, make sure selected folder has enough free space to store source device images.
Hint
ChallengerOS supports several partition types, from FAT,NTFS,EXT to Apple HFS. you can use a pre-formatted hard disk drive or create and format a partition inside ChallengerOS.
Selecting Source Device
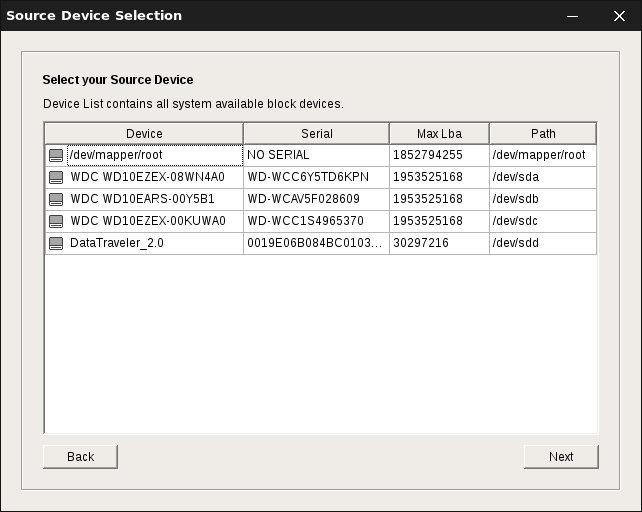
Any Selected Task should be associated with a source device.
Select Source Device Carefully and Check Serial Number every time.
Device list shows Model, Serial, Device Size in sectors and System Device Path.
Hint
If you do not find your device in source list, close Task Wizard and perform device scan action.Next Create a new Task Again.
Selecting Target Device
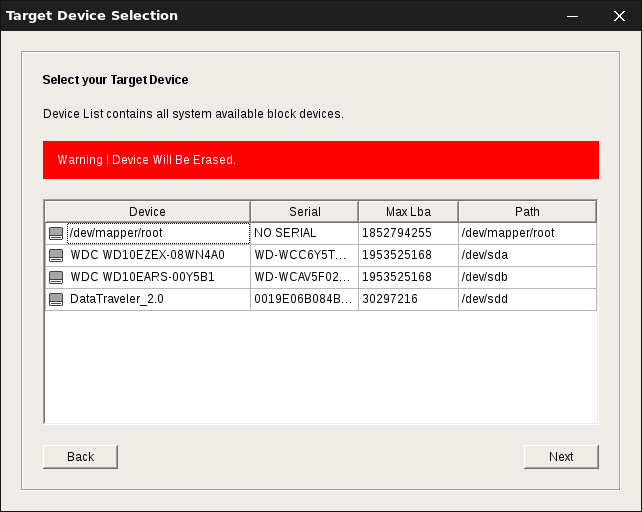
In all Cloning Tasks Target Disk Selection is required.
Check Target Device Carefully and Check Serial Number every time.
Warning
Target Device sectors will be DESTROYED and replaced with source data.
Recovering a task
If you created a task in persistent mode or into any valid partition you can recover map status re-creating a task with the same name in the same position.
If task to recover is an imaging task, also saved images will be recovered in the same status before task interruption.
Hint
Disk Images into a task folder will be not erased creating a new task in the same location.